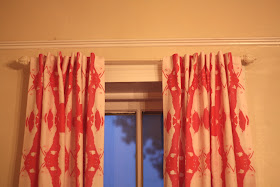
TAB BACK Drapes
These are about as easy as it gets...
These are about as easy as it gets...
...where sewing is involved.
and BONUS...
....they LOOK very Polished when done.
....they LOOK very Polished when done.
DISCLAIMER: Despite the fact that I won a Singer Sewing Contest when I was 13 years old...
I am the SHORTCUT QUEEN.
And when it comes to making something for my OWN home
my motto is
my motto is
so, I guess follow my instructions....bearing that in mind.
TUTORIAL:
I like to take advantage of the finished edges (the selvage on the sides of fabric)
so EACH panel is the WIDTH the fabric comes - 58"
I folded down 1. 5 " on each side, leaving the FINISHED width
55 inches.
- Supplies:
- Fabric
- Thread
- scissors
- measuring tape or yard stick
- "Stitch Witchery"!
I like to take advantage of the finished edges (the selvage on the sides of fabric)
so EACH panel is the WIDTH the fabric comes - 58"
I folded down 1. 5 " on each side, leaving the FINISHED width
55 inches.
TABS:

Snip and rip a piece the entire WIDTH long.
Each strip yields abut 11 TABS.
Each of my Panels used 11 TABS

Snip and rip a piece the entire WIDTH long.
Each strip yields abut 11 TABS.
Each of my Panels used 11 TABS
FOLD and iron a strip of fabric and
Top stitch along the edges


Finish one EDGE and CUT the full length into
CUT long strip into long pieces
Top stitch along the edges


Finish one EDGE and CUT the full length into
CUT long strip into long pieces
One 58" strip yields about 11 TABS.
so make your strips accordingly.
Now, with these drapes, I wanted MINIMAL
stitches on the curtains OUTSIDES and this is why....
ENTER
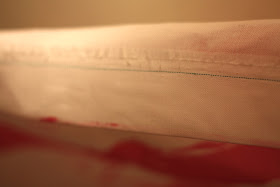
STITCH WITCHERY
Using the stitch witchery which I will now abbreviate to SW
prevent s the buckling and sagging that happens with machine stitching.
and yes, you also avoid sewing, though I find the work of ironing in the SW
a tad tedious...the Final product speaks for itself and makes any boredom worth while.
Oh, if you don't know SW is a mesh tape made of a substance that when ironed...turns to glue and bonds fabric together.
GENIUS!
Oh, if you don't know SW is a mesh tape made of a substance that when ironed...turns to glue and bonds fabric together.
GENIUS!
 |
| SEE...NICE AND SMOOOOTHHH |


APPLYING THE TABS
I like to have my tabs about 5 inches apart. This way,
when the Drapes fold up, they look like this from the front...


Measure the top of the Drapes and fold over the TOP 4 inches.
Lay each tab , 5" apart across the upper edge and stitch down to the top part.
I LIKE TO START IN THE CENTER WHEN LAYING MY TABS DOWN to pin them
and work from there....
ONLY SEW THROUGH the TOP portion and the Drapery and the
BOTTOM of the tab
THEN open it up and sew the tab TOP ONTO the
top OF the upper edge of the TAB,
.... do a STAY stitch (you-tube instructions for stay stitch)
just below the fold so the OUTSIDE will look like this...
THE sides and hem are DONE with the SW so guess what...
YOU ARE DONE!!!


No comments:
Post a Comment
Tell me what you are thinking... YOU are why I write a blog!!!